


Whether you're preparing for a special occasion or simply want to add some sun kissed glow to your skin, there's something about a golden glow that just makes you feel like the best version of yourself more confident, more radiant, and like you've just stepped off a flight from somewhere fabulous. The good news? You don't need a holiday (or harmful UV rays) to get it.
Fake tanning has come a long way with the right prep, the right product, and a little technique, you can achieve a natural, streak-free tan that lasts.
Whether you're getting ready for a big occasion or simply want to brighten up your everyday look, this guide brought to you by Ella Jo's Glow Tanning Range walks you through everything you need to know about fake tanning, from prep to application to making your glow last as long as possible.
How to Apply Fake Tan: Step-by-Step
Getting a smooth tan is all about the process. Follow these steps from start to finish for the best results with you Hydrate & Glow Gradual Tan.
-
Step 1 - Prep (24 hours before application)
The golden rule of fake tanning preps the day before, not the day of. In the 24 hours leading up to your tan, remove any unwanted hair, exfoliate to remove dead skin cells, and thoroughly moisturise dry areas like elbows, knees, and ankles. Doing this at least 24 hours before application gives your skin time to settle and ensures an even, long-lasting result.
-
Step 2 - Patch Test
If you're trying a new product or have sensitive skin, apply a small amount to a discreet area and wait 24 hours to check for any adverse reactions before applying all over.
-
Step 3 - Grab Your Tanning Mitt
Always apply Hydrate & Glow using a tanning mitt. It ensures smooth, streak-free application and protects your palms from staining.
-
Step 4 - Apply in Sections
Work your way up from the legs, taking it section by section. Use long, sweeping circular motions for an even finish. Leave your hands, feet, and face until last these areas require a lighter touch and more careful blending.
-
Step 5 - Let It Develop
Allow a minimum of 4–6 hours for your tan to fully develop. Avoid showering, sweating, or getting wet during this window, and opt for loose, breathable clothing to prevent any smudging.
Dos of Fake Tanning
-
Do Prep 24 Hours Before
All prep exfoliating, hair removal, and moisturising should be done at least 24 hours before you apply you Hydrate & Glow. This ensures your skin is smooth, balanced, and ready to absorb the product evenly.
-
Do Use a Tanning Mitt
A luxury tanning mitt is your best friend when applying your Hydrate & Glow Gradual Tan Moisturiser. It distributes product evenly, prevents orange palms, and gives you much more control during application.
-
Do Blend Well
Take your time with application. Work section by section from the legs upward using sweeping circular motions. Leave the hands, feet, and face until last, and use a sparing amount on these areas for a seamless, natural finish.
-
Do Wait Before Showering
Your lotion needs at least 4–6 hours to fully develop. Resist the urge to shower or exercise during this time to prevent streaking or uneven fading.
-
Do Patch Test First
Before a full application, always test a small amount on a discreet area of skin and wait 24 hours to rule out any reaction especially if your skin is sensitive or you're trying a new formula.
Don'ts of Fake Tanning
-
Don't Skip Patch Testing
Before applying fake tan all over your body, perform a patch test to check for any adverse reactions. Apply a small amount of product to a discreet area and wait 24 hours to ensure compatibility with your skin.
-
Don't Forget to Prep
Rushing through the preparation process can result in a patchy or uneven tan. Take the time to exfoliate, moisturise, and remove any unwanted hair before applying fake tan for best results. -
Don't Neglect Your Hands and Feet
Rushing through the preparation process can result in a patchy or uneven tan. Take the time to exfoliate, moisturise, and remove any unwanted hair before applying fake tan for best results. -
Don't Panic if Mistakes Happen
Even the most experienced fake tanners make mistakes from time to time. If you notice streaks or uneven patches, don't worry! You can just reapply you're gradual lotion onto these areas & you'll see a blend within 4-6 hours. -
Don't Wear Tight Clothing Immediately
Tight clothing can rub against freshly applied fake tan and cause streaking or smudging. Opt for loose, breathable clothing until your tan has fully dried and developed. -
Don't Forget SPF
Fake tan does not provide protection against harmful UV rays. Always wear minimum SPF30 when spending time outdoors to protect your skin from sun damage and premature aging.
How to Make Your Tan Last Longer?
Getting a great tan is one thing keeping it is another. Whether you're a gradual tan devotee or still weighing up the gradual tan vs instant tan debate, these tips will help your glow last longer.
1. Reapply every 2–3 days
Build and maintain your colour by applying Hydrate & Glow every few days. Because it works gradually, you stay in full control of your depth of colour.
2. Moisturise daily
Hydrated skin holds a tan for longer. Apply a light, non-oil-based body moisturiser every day paying extra attention to drier areas to keep skin supple and slow down the natural fading process.
3. Pat dry doesn't rub
After showering, gently pat your skin dry rather than rubbing with a towel. Rubbing causes friction that accelerates exfoliation and can leave your tan looking patchy.
4. Avoid long, hot baths
Prolonged heat and steam will break down your tan faster. Opt for shorter, lukewarm showers where possible.
5. Go easy on exfoliation
While regular exfoliation is essential before applying tan, avoid it in between applications. Scrubs, exfoliating body washes, and certain skincare actives (like AHAs) will strip colour faster.
6. Stay hydrated.
Drinking enough water keeps skin healthy from the inside out, which makes a genuine difference to how evenly your tan develops and fades.
7. Get that face glow.
Don't let your face miss out. Use the Face Filter Mist & Glow throughout the day to keep your complexion looking fresh, dewy, and luminous between applications.
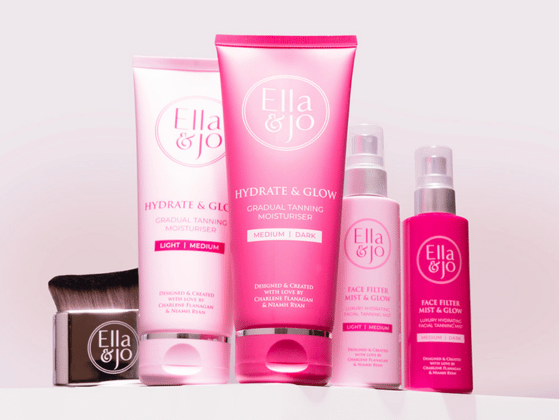
Get the full Ella & Jo Glow Tanning Range and find everything you need to tan with confidence, from you Hydrate & Glow Gradual Tan Moisturiser to you Luxury Velvet Glow Tanning Mitt. Happy tanning!
FAQs -
1. Why is my fake tan patchy?
Patchiness is almost always down to prep. Make sure you're exfoliating and moisturising at least 24 hours before application, and always blend thoroughly especially around the knees, elbows, and ankles where skin tends to be drier.
2. Does fake tan protect me from the sun?
No, fake tan offers zero UV protection. Always apply a minimum SPF 30 before heading outdoors, no matter how bronzed your skin looks.
3. How often should I reapply fake tan?
Every 2–3 days is the sweet spot for building and maintaining your colour because a gradual tan works slowly with each application, you stay in full control of how subtle or deep you want your glow to be.
4. Can I apply fake tan on my face?
Yes, but go carefully. Use a very small amount and blend well the face is more sensitive and needs less product than the body. We recommend using the Glow Kabuki Brush for a precise, streak-free application and finishing with the Face Filter Mist & Glow to keep your complexion looking fresh and dewy throughout the day.